 User Manual Q&A
Answer

Apr 19, 2025 - 04:54 AM
To install the DSC PC5108 Power Series Security System, please follow these steps:
1. Read the Installation Manual of the DSC equipment to which the PC5108 will be connected or powered from (e.g. alarm controller, power supply, etc.).
2. Determine whether you will be installing the PC5108 in the same metallic cabinet as the alarm controller/power supply or in a separate enclosure. Ensure that the internal and/or external wiring for the PC5108 is routed, supported, clamped, or secured in a manner that reduces the likelihood of excessive strain on wire and terminal connections, loosening of terminal connections, and damage to conductor insulation.
3. Familiarize yourself with the specifications of the PC5108, including temperature range, relative humidity, input rating, board current draw, board dimensions, and VAUX output ratings.
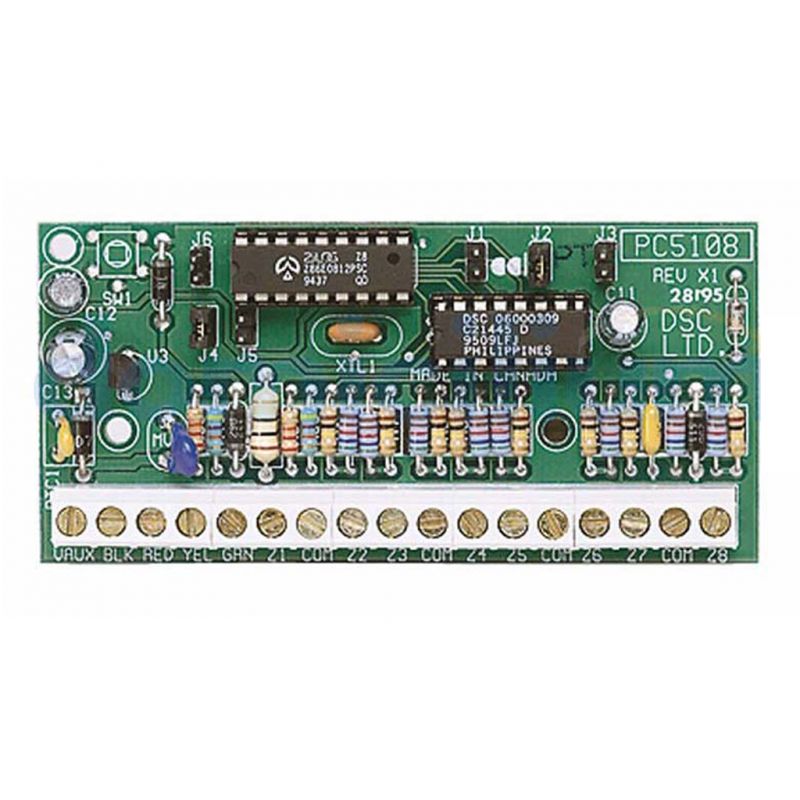
4. Understand the terminal descriptions of the PC5108:
- TAM: Used to tamper the cabinet in which the PC5108 is mounted. Connect a normally closed (NC) switch across TAM and BLK. If the tamper is not being used, connect a piece of wire across TAM and BLK to remove the trouble condition.
- VAUX: Used to provide power for devices. Maximum current draw should not exceed 100mA. Connect the positive lead of powered devices to VAUX and the negative lead to BLK or any COM terminal.
- KEYBUS: The 4-wire Keybus connection is used by the panel to communicate with the module. Connect the RED, BLK, YEL, and GRN terminals to the KEYBUS terminals on the main control panel.
- Z1 to Z8: Wire the zones according to the description found in the control panel Installation Manual.
5. Determine the appropriate enclosure for your installation. The PC5108 can be installed in various metal enclosures listed in the manual. Ensure that tamper protection switches are installed on the enclosures if required.
6. Set the jumper settings on the PC5108 according to the control panel software version. Refer to the manual for specific instructions on jumper settings.
7. To add hardwired zones to a control panel:
- Connect the PC5108 module to the Keybus with the panel powered down.
- Set the jumpers on the module according to the control panel software version.
- Power up the system.
- Enter the appropriate sections in the control panel to define and add the zones.
Please note that this answer provides a general overview of the installation process. For detailed instructions and specific information, refer to the DSC PC5108 Power Series Security System Installation Manual.
To install the DSC PC5108 Power Series Security System, please follow these steps: 1. Read the Installation Manual of the DSC equipment to which the PC5108 will be connected or powered from (e.g. alarm controller, power supply, etc.). 2. Determine whether you will be installing the PC5108 in the same metallic cabinet as the alarm controller/power supply or in a separate enclosure. Ensure that the internal and/or external wiring for the PC5108 is routed, supported, clamped, or secured in a manner that reduces the likelihood of excessive strain on wire and terminal connections, loosening of terminal connections, and damage to conductor insulation. 3. Familiarize yourself with the specifications of the PC5108, including temperature range, relative humidity, input rating, board current draw, board dimensions, and VAUX output ratings. 4. Understand the terminal descriptions of the PC5108: - TAM: Used to tamper the cabinet in which the PC5108 is mounted. Connect a normally closed (NC) switch across TAM and BLK. If the tamper is not being used, connect a piece of wire across TAM and BLK to remove the trouble condition. - VAUX: Used to provide power for devices. Maximum current draw should not exceed 100mA. Connect the positive lead of powered devices to VAUX and the negative lead to BLK or any COM terminal. - KEYBUS: The 4-wire Keybus connection is used by the panel to communicate with the module. Connect the RED, BLK, YEL, and GRN terminals to the KEYBUS terminals on the main control panel. - Z1 to Z8: Wire the zones according to the description found in the control panel Installation Manual. 5. Determine the appropriate enclosure for your installation. The PC5108 can be installed in various metal enclosures listed in the manual. Ensure that tamper protection switches are installed on the enclosures if required. 6. Set the jumper settings on the PC5108 according to the control panel software version. Refer to the manual for specific instructions on jumper settings. 7. To add hardwired zones to a control panel: - Connect the PC5108 module to the Keybus with the panel powered down. - Set the jumpers on the module according to the control panel software version. - Power up the system. - Enter the appropriate sections in the control panel to define and add the zones. Please note that this answer provides a general overview of the installation process. For detailed instructions and specific information, refer to the DSC PC5108 Power Series Security System Installation Manual.


Add New Comment